How to set up and get started with the Raspberry Pi
- The Raspberry Pi
- Install Raspberry Pi OS
- The boot partition
- Headless setup
- Connect to your Raspberry Pi with SSH
The Raspberry Pi
The Raspberry Pi is a very popular, tiny and low cost single-board computer built by The Raspberry Pi Foundation and used in many DIY and production projects.
We use this tiny computer in a lot of our projects here on Print In 3D.
The Raspberry Pi comes in many different versions and has evolved a lot since its first release in 2012. Although mainly used as a headless server, most of the Pis comes with HDMI, Ethernet, USB, WIFI and a headphone jack and can be used as a full desktop computer with a monitor, mouse and keyboard.
The Pi does not come with built in storage. Instead a microSD card is used
The Pi comes in many different forms and shapes. Today we will focus on two on them.
Raspberry Pi 4 Model B
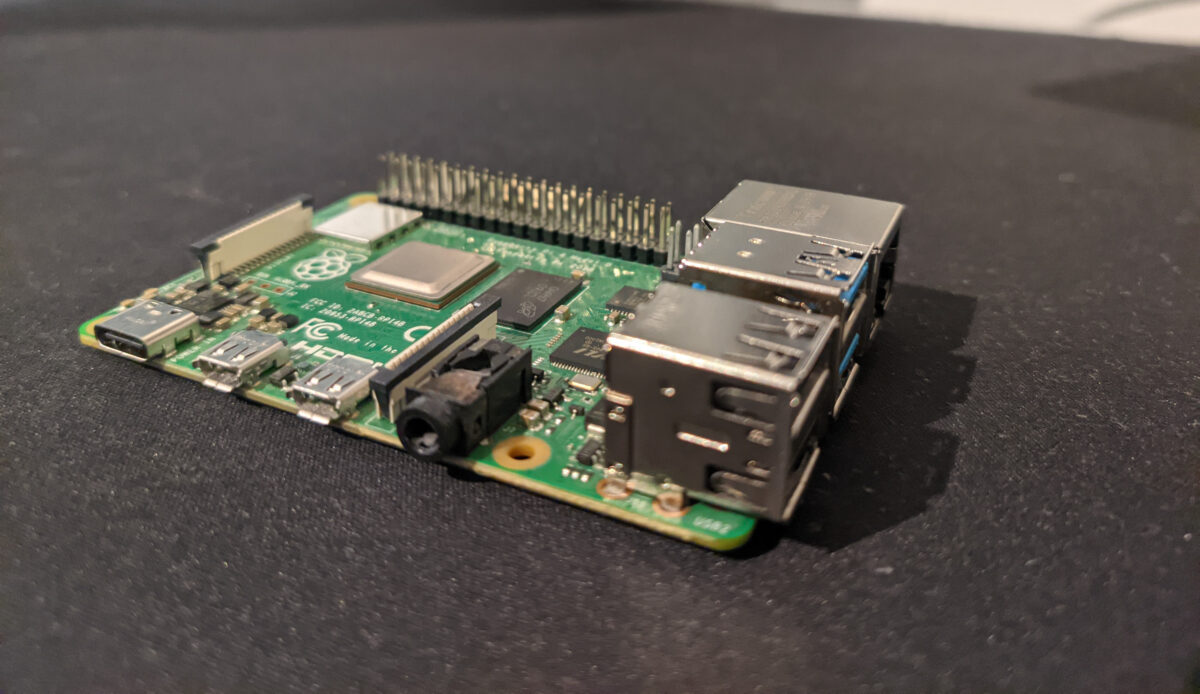
This is the latest full-sized Pi and comes in four different variants where the difference is the amount of RAM 1GB, 2GB 4GB and 8GB. The size, power and available ports makes it ideal for a home media server.
Raspberry Pi Zero 2 W
The Raspberry Pi Zero 2 W is the latest and second variant of the Pi Zero W. The W means it has WIFI.
The Pi 2 W is much smaller and weaker compared to the Pi 4. It does not feature an Ethernet port or a USB A port and comes with 512MB RAM. The Pi Zero 2 W does however have a mini HDMI port and 2 Micro USB ports making it ideal for smaller projects such as a wireless security camera or a wireless USB server.
Install Raspberry Pi OS
The Raspberry Pi OS, previously called Raspbian, is the operating system for all Pi’s.
To install, download the official Raspberry Pi Imager, Put your SD Card in your computer and run the imager.
The boot partition
The boot partition is where the magic happens. It contains the boot loader which is responsible for booting the Raspberry Pi.
It is in this partition you enable WIFI and SSH in a headless setup.
These are the files that are supposed to be in the boot partition by default. Use this to make sure you are in the right partition.
Headless setup
A headless setup is a setup without a monitor, keyboard, mouse, or other peripherals. It is normally used as a server and controlled over the network.
In order to connect to your headless Pi, you first need to create a user/password, enable WIFI and SSH access by placing three files in the boot partition.
Set default password for pi user.
Create a file called userconf in the boot partition of your SD card. In this file we need to add the username and an encrypted password like this.pi:<encrypted-password>
Run this in linux to generate an encrypted password: echo 'mypassword' | openssl passwd -6 -stdin
This is how the file should look if you want to use the old standard password “raspberry”
pi:$6$6jHfJHU59JxxUfOS$k9natRNnu0AaeS/S9/IeVgSkwkYAjwJfGuYfnwsUoBxlNocOn.5yIdLRdSeHRiw8EWbbfwNSgx9/vUhu0NqF50It is possible to change the username to anything you want but it is not recommended due to the fact that a lot of software for the Raspberry Pi still rely on that username.
Enable WIFI:
Create a file called wpa_supplicant.conf in the boot partition of your SD card.
Add this text to the file and change the country, ssid and psk.
country=usupdate_config=1ctrl_interface=/var/run/wpa_supplicantnetwork={ scan_ssid=1 ssid="Your-WIFI-SSID" psk="Your-WIFI-password"}Enable SSH:
Create an empty file called ssh in the boot partition of your SD card.
Connect to your Pi with SSH
First we need to set a password for the default pi user and enable SSH. To do so have a look at the headless section.
In order to connect we need to find out the IP of the Pi. There are a few was we can do this. Here are two examples.
Check through your router:
Log in to your router and have look at the connected devices.
With the Pi connected to a monitor and keyboard
Run ifconfig or hostname -I
Now that we have the Ip-address, lets try connecting to it using SSH. The default username is pi.
On linux run the command ssh pi@<the RPi IP-address>
The easiest way to connect from Windows is by using Putty. A free SSH client for windows.
Simply install and open Putty, put the IP-address of your Pi in the “Host” field and click “Open”.

